My Blog List

Saturday, December 11, 2010

GREENLEAF WOOD TILES!

After sanding, prepping, then sanding the entire doll house again, I decided I might like to tackle the deli floor.  Truth be known, while I do plan to electrify the entire doll house, I thought at least getting something done before I threw myself into all the trials and tribulations of electrifying the thing would keep me motivated!  And since none of the wiring would be running across the lower-level floor, it seemed like a good place to start!

As I plan to install wood floors on the upper levels, I was interested in doing tile floors in the deli, just to mix it up and give it some contrast.  There too, almost every deli I have personally encountered in NYC has tile floors, and I really thought it would give the place an authentic look.  So I went in search of something different.  But deciding exactly what to do was perplexing.

There are so many tile floor options on the market for the doll house miniature enthusiast, and that includes sheets of paper tiles, molds to make your own, individual linoleum and ceramic squares, and wood.  I had even considered cutting down a couple of self-adhesive life size linoleum squares into 1" pieces, but thought it would take me a month of Sundays just to get enough to cover the large main floor! 

And then I stumbled upon these wood parquet tiles that seemed  ideal.


Check out these sample photos from www.greenleafdollhouses.com!  Doesn't this look like the perfect solution?  I eagerly ordered not one, but two bags of these things...just in case...and then just as eagerly tracked their route on-line while waiting for the UPS truck!


Which makes my disappointment upon their arrival even more heartbreaking.  Based on the above photo, I thought they were going to look like a less polished version of Scrabble tiles.  What I got instead was a bag full of wood chips!  They were almost paper thin, not even cut remotely even, and the bag was full of saw dust!  Quite honestly...I hated them.  I had spent almost $30 (plus postage!) to cover 800 square inches...far more than I would actually need...only to find myself headed right back to the drawing board. 

And then an amazing idea came to me out of nowhere!

I remembered one of the many botanical gardens I had visited on one of my many road trips, but I couldn't remember in what city I had seen it.  What I did recall was the feeling invoked by the old tile floors that adorned the main conservatory.  They had an inviting appeal,  imperfect as they were, that gave the space lots and lots of patina.  I remember thinking they must have held up for years, and they still looked incredibly current and so full of character.  Maybe they were slate.  Or perhaps they were concrete. Whatever they were, I liked their style and it made an impression...apparently not enough to remember where I saw them (ha!), but enough to still hold a place in my memory.


After doing a bit of research, I found my inspiration!  While not an exact duplicate of my personal conservatory experience, it does come awfully darned close. I absolutely LOVE this look!  I LOVE the different tones in the tile!  I LOVE the feeling of the squares not quite matching up!  And I LOVE the color!  With that in mind, I set out to see if perhaps I could salvage my bag of wood chips and turn them into something truly unique and beautiful!


Sunday, November 21, 2010

IN SEARCH OF...WALLPAPER!

Maybe it's my background in interior design, or maybe it's the fact that I spent SOOO much time on-line over the past year, checking out what other people have done with their doll houses...but I decided, you just can't design one room at a time.  I know this is not a professional opinion, it's just my own...but it seems to me that just like a real house...you have to have a plan.

I did notice that on a personal level, I was drawn to the finished doll houses that had some kind of continuity in style. They had a theme going on that made all the rooms feel connected.  I think I am especially drawn to this because unlike a life-sized home, when you look at a doll house, you can actually see all the rooms...or most of the rooms, depending on the style of your doll house...at once.  For this reason, I made a conscious decision to coordinate my rooms from the start.  But I needed to find that common thread to be used as a spring board for the design.

Because this is the first doll house I have ever had to finish and style, I knew I would need to go with wallpaper for probably most, if not all, of the rooms.  While there are certainly many patterns to choose from, I had previously discovered from all that research that 1)  There's a lot of really cheesy country mini-wallpaper out there, and I am not all that keen on cheesy country.  2)  A lot of the mini-wallpaper is shiny!  I don't even like shiny wallpaper in real-life, and I think it would be especially horrid in mini-life!  And 3) Doll house wallpaper can be very expensive!

At the same time I was looking for a pattern to inspire me, I was also looking for something embossed to put on the ceilings.  I knew I wanted something that would look like tin or tile, but I also knew I didn't want to pay $6.00 a sheet for the opportunity.  So I went looking for some real-life wallpaper that would mimic that.  Finding an entire roll was my goal, so I if I screwed up, I would have plenty to replace it.  And what I found was a roll of anaglypta wallpaper from Fred's Decorating in Chicago.  Here it is...


I like this wallpaper a lot!  It has a deep embossed design, it's paintable, and the little squares will mimic a real tin ceiling nicely, I think!


Personally, I don't know why tin ceilings ever went out of style.  They are so beautiful to look at...but now,  much more expensive to install than they use to be.


Above is a photo of the white painted ceiling tile in designer Windsor Smith's kitchen!  Now who wouldn't rather look at that than plain old sheet rock?  So as long as I had found the perfect embossed wallpaper for the ceiling at http://www.fredswallpaper.com/ (and at a darned good price, I might add!)  I decided to see what else this website might have to offer.   

AND THERE IT WAS!


Not exactly what I had originally thought I wanted, but I fell in love with it immediately!  Since I already kind of had a color scheme for the exterior in mind (we'll discuss that later) this wallpaper not only seemed to enhance my vision, but was the right scale for what I had in mind. 

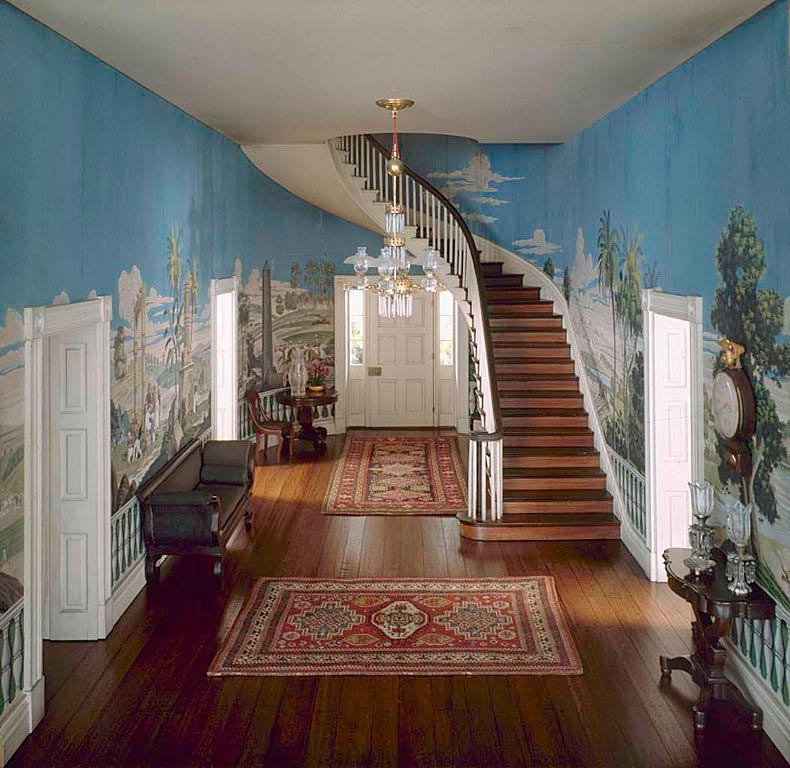
There too, I had just visited Andrew Jackson's historic home, "The Hermitage", and was probably still a little under the influence of the wallpaper that had been imported from Paris for the entrance hall.


There is a definite grandness about this style of wallpaper that I wanted to insert into the brownstone.  I've seen it in historic old homes before.  I've even seen it in grand old brownstones in New York and Philly.  So it seemed fitting to me.  Plus...I really like the colors and pattern.

So maybe the teeny tiny couple who own the deli and live here will have to be Italian!  The wallpaper most definitely has a Tuscan feel.

Thursday, November 18, 2010

THE BROWNSTONE RESIDENCE AND IT'S RESIDENTS!

When I decided to install a deli on the first floor of my doll house, I had to think about what I was going to do on the upper levels, too.   It wasn't a tough decision.  I envisioned the tiny couple that owned the shop on the first floor would probably be the same tiny couple residing above.  And because this is a New York brownstone and New York is a melting pot of cultures, I envisioned immigrants from the old country.  


While I was not really sure what 'old country' they should actually hail from, I imagine they probably came here with nothing, built up their business, raised their family, and are soon to retire...but their work ethics won't allow it.  


With that in mind, I decided I needed to give the residential rooms a more elegant European-style decor.  My imaginary mini-couple have built a life together, worked hard, invested wisely, and live well, but not beyond their means.  They are more inclined to purchase quality items...classic and timeless...and take good care of them.


After being a part of the Upper West Side for decades, they are now considered pillars in their community and enjoy a quiet, more traditional lifestyle at home.

Ok.  So I admit it...planning for this doll house has so far been half the fun!

A NEW YORK STYLE DELI!

Many of the brownstones in New York house a business on the lower-level and tenants or office space in the upper stories.  Because the first floor ceiling in my brownstone doll house is about an inch lower than it is on the upper floors, I decided to create my own little deli, just like you might see in New York...only much, much smaller!  


Of course, I don't have near as much room to work with, but my goal is to add a couple of display cases filled with sandwiches and salads out front, and maybe another case with sweet treats, coffee, and a little cafe table and chairs in the back.  PS - I don't know where exactly the photo below came from, but I really do like the tiles!  They were a real inspiration for the floor I plan to install in the doll house deli.


Because space is as limited in New York as it is in my doll house, I might consider giving it some real deli-style by hanging sausages, meats, and cheeses from above, just like they do at Zabar's, pictured below.  I totally dig the tin-ceiling!


The fun will be inserting my own style, just like opening my very own little shop!  


...and of course, adding all the teeny-tiny details!


Wednesday, November 17, 2010

I 'HEART' NEW YORK!

So why do I love my brownstone doll house so much? Perhaps it's because I spent some of my young adulthood in NYC, living among the Manhattanites as an imported Midwestern nanny. For me, it was sort of like "An American in Paris." Everything, every thought, was completely foreign and not easy to translate for a small town girl like me.  There too, I was use to cornfields, not so much concrete.


I lived on the Upper West Side, on the corner of 77th Street and Central Park West. The living room over looked the Museum of Natural History, and my bedroom (and all other rooms on that side of the apartment) faced Central Park. For a kid who grew up in Northern Minnesota, I knew I was very, very lucky to be living this once-in-a-lifetime opportunity.  


The feelings I experienced there are the same feelings I hope to invoke in my own little brownstone. I've been back to the Upper West Side many times since, and plan to use the buildings, streets, and scenes to finish my doll house.  


For me, it will be like reliving a wonderful time in my life that I enjoyed immensely, while reinventing the surroundings that I still think of fondly and often.


Tuesday, November 16, 2010

MY MINI BROWNSTONE!

Here is a sample photo of the doll house I am working on.  It's a beautiful New York brownstone, and it really is from New York!  I bought it on e-bay about a year ago from a nice man who lives in Brooklyn.  This is a photo of the front exterior of the house that was supplied.  It's very sturdy, heavy as heck, unique in that it opens from both the front and the back, and came with a faux-textured sparkly finish that I must admit I'm not too crazy about...but the finish is just on the doors and trim.  The front steps are removable and have a side door that goes under the staircase to allow access through another door on the lower level...just like a real brownstone!  This house is all handmade and I see he still sells them on e-bay.  As far as I can tell, he's pretty much cornered the mini-market on New York brownstones!  If you want one, just search 'brownstone doll house' on e-bay, and if he's got one up for auction, it should pop up, no problem. It's definitely the most affordable brownstone in NYC!  :)


This is the front interior of the brownstone.  From the photos, you will notice it has three levels.  Again, this photo is supplied by the builder, but almost exactly like the one I received except mine has a faux fireplace glued to the back wall on the second floor.  I think he must have used Super-Glue to attach it because so far, I've had no luck removing it.  But I'm working on it.  


Here it is from the side with the back doors open.  As you can see, there is no texturing (or paint) on the sides.  Which is absolutely fine by me!  I actually plan to re-do the exterior by re-painting the front and back, and adding stone block to the sides.   So, yes!  As you can tell from the photo...it is a really big doll house! 


Below is a view with the back doors open.  He also made the kitchen cabinets shown on the second floor that came with the house.  Again, they must have been Super-Glued to the wall...I had a terrible time trying to get them out.  When I finally did  manage to pry them loose using a putty knife, hammer, and lots of prayer, my knuckles were bleeding and the wall had big gouges yanked out of it where the glue was stuck! 

I can hardly wait to tackle that fireplace, again.


TRULY INSPIRING!


If you haven't had a chance, please do pick up a copy of 'Magnificent Miniatures' by Kevin Mulvany and Susie Rogers.  It truly is one of the most exquisite books on miniatures I have ever read!  The photos are to die for, and the work these two have put into their doll houses is amazing, to say the least.  Personally, I don't have this kind of skill and I will never have this kind of skill when it comes to miniatures, but hey!  It's something to shoot for!  I picked my copy up at www.amazon.com.  I highly encourage you to do the same if you are looking for inspiration.  It's an absolutely beautiful book!  For more info and lots of lovely photos, click on the link to their website under the photo.  Definitely worth a visit!

Monday, November 15, 2010

MY TEENY-TINY OBSESSION!

I can't think of anything more adorable than a teeny-tiny little table, or a tiny little roll of paper towels, or anything else that falls into that teeny-tiny little category.  Not sure why I find these teeny-tiny  things so incredibly amazing, but to see something shrunk down to Lilliputian size truly does fill my heart with joy!

Admittedly, this great big obsession of mine with all things miniature didn't just happen overnight.  It actually started when I was five years old and Santa brought me my first doll house. Granted, it was only made of plastic and not near as fancy-shmancy as the doll houses I'm into now, but it was the most glorious mansion on the planet in my little world.  And while that doll house is long gone now, it is certainly not forgotten and will always hold a very special place in my heart for introducing me to my lifetime obsession with all things teeny-tiny.

Over the past several years, I've had the opportunity to indulge in my fascination with miniatures by investing in several doll houses...two of them pre-built, one of them vintage, all of them in need of finishing and lights.  In my search to find instructions, techniques, furniture and supplies, I have run across many inspirational ideas and many wonderful people, all of whom seem to be as teeny-tiny obsessed as I am.  As a result, I have decided to put together this blog so I can share with like-minded individuals who might have a similar infatuation with all-things miniature.

My goal with this blog is to dedicate at least three hours a week to work on my doll house projects, and as I do, I plan to post photos of my progress and discuss.  Along the way, I will introduce works by miniature artists I admire, discuss finishing products and materials, and share ideas I find interesting.  If you want to keep track of the latest, make sure to follow Lah-Di-Doll-Blog!

Thank you for visiting, and hope to see you again, real soon!